Showing posts with label Works for Me. Show all posts

Monday, June 23, 2014

Kitchen Towel Hack

Fold the edges of the towel in to the center.

Hang the towel over the oven door handle.  Gather the front portion and rubberband.

Twist the rubberband into a figure eight.  Feed the back part of the towel through the back circle of the rubberband.

Startin with a corner, pull the front part of the towel through a napkin ring.  Position the napkin ring over the front part of the rubberband.  Tweak the towel so that it is hanging evenly with the napkin ring hiding the view of the back part of the rubberband.

Wednesday, June 25, 2008

Works for Me Wednesday: Blog Banner How-To


I entertain myself by designing a new blog banner frequently using my own pictures (or my family's). Many of my banners have been fairly makeshift as I have learned more and more about tweaking my template. My current header is my favorite so far, using pictures taken by my husband and son on a backpacking trip. Since a friend recently expressed interest in learning more about how to tweak her template, I thought I'd explain here what worked for me in making my blog banner.

Recently I came across a fun site called fd's Flickr Toys. I have an Flickr account, but it is not necessary to use the site. The Flickr toy I used to design my header was the Mosaic Maker. I arranged the pictures for the top of my blog using three columns and one row. Once I created my mosaic, I saved it to Flickr and to my computer.

The next handy site I visited was Picnik, a FREE, online photo editing site. After acquiring my mosaic from Flickr (alternatively, I could have uploaded it from my computer), I clicked on the "Create" tab and used the Frames option to add a drop-shadow. I saved this copy of my Mosaic.

I must confess that I added the text to my mosaic using Adobe Photoshop. I realize that not everyone has that software, but many people have some type of photo editing software that includes the option to add text.

After adding text to my mosaic and saving it, I re-sized the mosaic to fit my blog. I did this in Photoshop as well, but it is possible to do it in Picnik.

In blogger, I looked in Layout >> Edit HTML and found this in my code:
/* Header
-----------------------------------------------
*/

#header-wrapper {
width:780px;
margin:0 auto 10px;
border:0px solid $bordercolor;
}


This told me that the width of my header is 780 pixels.

In Picnik, upload the most recent copy of the mosaic, click on the resize tab, and type in the pixel width of your blog header in the first box. (Mine is 780) Make sure that you check off "Keep proportions." Save the re-sized mosaic. This is the copy that you will upload to the header section of your blog in "Layout."

If anyone tries to follow the above instructions for creating a banner and has trouble, please let me know and I will try to explain better...

Last week, I posted the instructions that helped me put together my current template. Another helpful link explaining how to design your own blog banner can be found HERE at Design Mom blog.

Flickr Toys Mosaic Maker and Picnik: Works for me!


Wednesday, June 18, 2008

Works for Me: Template Tweaking

My blogging friend "Sunshine" recently commented that she needed to customize her blog, but didn't yet know how to go about it . I thought I'd post some links here that have helped me to tweak my own template.

The number one help to me in customizing my own blog has been the free e-book The Cheat's Guide to Customizing Blogger Templates written by Amanda at Blogger Buster. Amanda has written clear step-by-step instructions to get the job done. I followed her instructions to a "T" in the basic layout of this template (though I did go one step further in widening it) and am quite happy with the results. In fact, since Amanda regularly posts helpful tutorials on building a better blogger blog, I highly recommend searching her archives at Blogger Buster.

Blogger Buster works for me!

Next Wednesday, if there is interest, I will post some links that helped me to design my current blog header...

Wednesday, April 23, 2008

Bottoms Up!

100_3163Long, lean legs are the genetic norm in this family, even for the babies. After cloth diapering four babies and taking in the leg openings on diaper covers to avoid leaks, I have found a diaper cover that fits skinny-legged babies without alteration: Blue Penguin Pull-On Snap-Off Diaper Covers.

The Blue Penguin POSO covers are similar to the popular Mother-ease Air Flow covers, but they adjust to a smaller circumference in the leg. Works for me!


Wednesday, April 09, 2008

First Annual Pencil Contest

Sometimes the littlest things can be the biggest frustrations when it comes to homeschooling. A brand new box of pencils can quickly slip through my kids' fingers into some other dimension through an invisible Mirado Black Warrior Hole. The amount of time wasted in searching for a pencil could probably add an extra day to our yearly school schedule.

In February, I decided that I needed to troubleshoot the pencil problem before I lost my sanity along with my temper, sadly. I started a pencil contest for my children and myself, giving each contestant one pencil labeled with his/her name.

"Keep it safe. Keep it sharp. Keep it free of bite-marks. Above all keep it. The person who keeps his/her pencil the longest wins!"

Believe it or not, our contest is still ongoing!

Evan and Matthew wore their first pencil down to an ergonomically incorrect nub and were issued a replacement pencil. Sophie writes with more of a delicate feminine touch and still has her first pencil. They all wore out the original erasers on their pencils, but Evan hot-glued cap erasers to the pencil ends (the only way to keep cap erasers from falling into the black hole).

I have decided that if all of the kids keep their pencil (or mom-authorized replacement) until the end of the school year, I will give each of them a prize.

Our first annual pencil contest is saving us some time, money, and sanity and is contributing to a more peaceful homeschooling atmosphere. It may seem like a little thing, but it works for me!

Wednesday, August 15, 2007

Road Trip Magic


Summer is often the time for a family road trip. This is an unusual summer for us in that we have stayed close to home, but I'll share my children's favorite road trip activity.

Crayola Model Magic is an air-drying modeling material that is easy to use, and best of all, is easy to clean up. My children have used it on three road trips so far, and it has never stuck to anything that it shouldn't. Each of my kids sits in the van with a lap tray which provides the surface for sculpting.

Crayola Model Magic provides a creative, minimally messy activity that works for me! Visit Rocks in My Dryer to read more helpful tips.

Wednesday, June 06, 2007

Dress for All Seasons

These two pictures show some long-sleeved dresses that my daughter wore during cool weather. (Admittedly, the lavender dress was a bit big on her at the time of the first picture, but it was spring, and she wore the dress throughout the following winter.)

100_0093100_1125


And below are the same dresses altered for warmer weather! My daughter will grow out of the dresses by this coming fall, but the short sleeves add to the time that she can wear them.

100_2143100_2141


The light colors and knit fabrics allow these dresses to span the seasons. Works for me!

Wednesday, May 30, 2007

"Recycling" China

My Grandma enjoyed her collection of tea cups and saucers and did not know what to do with this particular saucer when the tea cup broke. She gave it to my aunt who gave it to me and now I have a unique and lovely soap dish! The colors complement the decor of my bathroom. While the towels and other accessories merely bring to mind the department store from which they were purchased, this dish reminds me of my dear Grandma.

Works for me!

Wednesday, May 23, 2007

Ode to the Ergo

I've posted praises for my Ergo baby carrier before and now that it is time for another Works for Me Wednesday, I'll praise it again.

How did I manage to care for three babies without it?

The Ergo is the first baby carrier that I have used that has not strained my neck or back. It is truly an ergonomically correct baby carrier, not only for the baby, but for the mommy (or daddy).

I'm impressed with how content Logan is to sit on my back, sucking on the Ergo strap, playing with a toy, or just observing the activity around him as I help the older kids with schoolwork or get work done around the house.

He gets plenty of time to crawl around, explore and play, but there are certain times when he just needs to be held. The Ergo helps me to meet his needs while still meeting the needs of my older children.

Today I held Logan in the Ergo and walked about the room as I read to my older kids. On Sunday, halfway throught the church service, I put him in the Ergo and he fell asleep while I stood at the back of the sanctuary still able to listen to the sermon. Last Friday, I held Logan in the Ergo for hours, because he was fussy due to teething and I had food to prepare for Evan's birthday party.

I am looking forward to hiking in the mountains this summer without the added weight of a backpack frame!

I purchased my Ergo from this great online store. Works for me!

Wednesday, May 16, 2007

Towards Multiplication Mastery

My seven year old daughter has begun learning the concept of multiplication as well as memorizing multiplication facts. A friend of mine just emailed me last night and asked for ideas to help her own daughter master her multiplication facts.

This time around, I have been much more consistent in having my child learn skip counting. I wasn't as diligent with my older two boys. They do know their multiplication facts now, but I can see that memorizing skip counting lays a more thorough foundation than just drilling facts. Skip counting communicates the concept that multiplication is fast adding.

We have a skip counting tape which sets the number lists to music, but the tunes are, for the most part, not familiar, making them difficult to learn. So, I just picked my own tunes and used the word "and" strategically to make the list fit the music! For instance, for 6's, I used "Lightly Row": six, twelve, eight-teen, twen-ty-four, thir-ty, a-and thir-ty-six, for-ty-two and for-ty-eight, fif-ty-four and six-ty.

Now when my daughter solves multiplication problems (or division), she can use her skip counting to find the answer. For instance: 6 x 6 ~ She can count "6, 12, 18, 24, 30, 36", keeping track how far to go by holding up fingers until she gets to six fingers. She can do this fairly quickly and with repetition is memorizing her facts.

Of course, she drills the facts as well and now we have a tool to use: The Flashmaster which is just a high-falutin' way of doing flashcards, but more fun.

Even at Sophie's young age, she already has her upper times tables down cold thanks to this gem:


The advertising claims that this tool helps children to learn their upper times tables in about an hour. I purchased and used Times Tales Deluxe with my kids and found the advertising to be accurate! My boys already knew their facts, but my daughter learned them for the first time in an hour and still has excellent retention of the facts months later.

These tools for multiplication mastery work for me!

Wednesday, May 09, 2007

Vanicream

In the past six weeks, my 9 month old developed a nasty case of eczema. From past experience, I knew that our pediatrician would recommend using hydrocortisone and Aquaphor. I'm not thrilled with using a steroidal treatment on my kids and I've had limited success with Aquaphor. This time around, first I tried using a coconut oil lotion, again with limited success (though it is my favorite lotion to use on my own Colorado dry skin). Finally I listened to my cousin who recommended ...


The Vanicream has caused the redness to fade and the rough patches and bumps are mostly gone.

Works for me!

Wednesday, May 02, 2007

Birthday Cakes, Cards and Crafts

This week's Works for Me Wednesday features a birthday theme. I've never been particularly fond of making birthday cakes, but my most infamous confectionary catastrophe occurred on my second child's third birthday. I baked a cake from a mix in a 9X13, and leaving it in the pan, I frosted it with whipped cream and attempted to decorate it with colorful sprinkles. Bad idea. The cake absorbed much of the cream and the lid fell off of the sprinkle shaker, dumping the candy confetti unceremoniously in a heap. Thankfully my three year old did not have much aesthetic sense and was perfectly thrilled with the mess. Unfortunately for me, the cake is memorialized in full-color pictures. (No I will NOT scan one in and post it!) I wailed to my husband, "Why can't I buy the cake and make the card? I'm much better at cards!"

Fortunately, before my children grew old enough to catch on to their mother's incompetence, familyfun.com came to my rescue. I'm betting that many wfmw participants will post about this wonderful website with a cake finder to provide step-by-step instructions for truly easy-to-make cakes that are guaranteed cute, allowing any mom to become a member of the "Fun Mom Club."

Betty Crocker is another good source of easy recipes for birthday cakes. Here is a cake that I made from a Betty Crocker recipe:

I still would rather make a birthday card! Here is a goofy card that my husband and I made together for my oldest son for his eighth birthday:


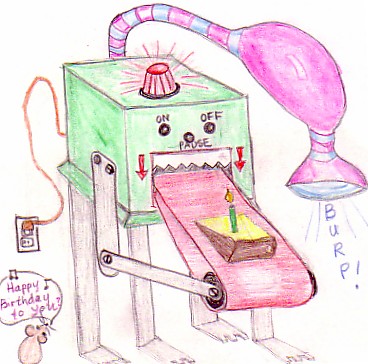
On the front of the card, we wrote: "For your birthday, we wanted to invent a CAKE EATING MACHINE..." Inside: "but then we realized: That's Why We Have YOU!!" (I said it was goofy.) I put together a little collage below this of small scanned in pictures of my son with cake at each of his previous b-days.

Our family's most elaborate birthday party in the past was a "Flying Pony Party" (named by my daughter) which included a hobby horse craft:

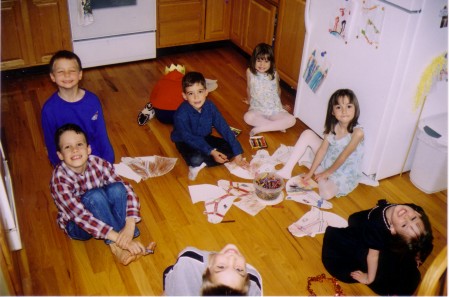
When the kids arrived, they colored posterboard pony heads that I had drawn and cut out ahead of time. Two other moms and I, armed with glue guns, stuck googly eyes on the ponies, glued on each kid's choice of crinkle paper mane, and attached a stick to make homemade hobby horses. (The mane and stick were sandwiched between two posterboard pony heads.)


This concludes a very wordy Works For Me Wednesday post!


Wednesday, March 14, 2007

WFMW: Camoflauged Classroom

Last spring, before the birth of our fourth child, I converted our homeschool classroom back into a bedroom. With the loss of a schoolroom, we thought of having our basement finished, but we decided against it upon finding out the cost! Instead, we returned to "doing school" on the main floor of our house, and I was forced to come up with a creative storage solution.

My china cabinet, in the dining room, was given to me by my grandparents. I enjoyed having china displayed in the dining room, but practicality won out. I moved all of the displayed china into a kitchen cabinet and moved the schoolroom supplies to the cabinet. At first, I intended to hang curtains inside the glass doors to hide the clutter, but then I found baskets at Target which sufficiently contained the supplies while still looking nice (I think). Here is the end result:

100_0260

I am thankful that the supplies are hidden so that the dining room doesn't look cluttered! Works for Me! (Now what to do with my pathetic plants...)

P.S. The time change definitely does NOT work for me!


Previously on WFMW:

100_1653 100_0730 stickblender

Wednesday, March 07, 2007

WFMW: A New Twist on Soup-Making

This stick blender ranks as my favorite and most fun kitchen tool. Some of my family's favorite soups require pureeing which previously meant transfering hot liquids and vegetable pieces to a blender in batches. This proved to be messy and time-consuming. This immersion blender makes the job faster and less messy, while it is easier to clean than a blender pitcher. As an added bonus, recently my kids each enjoyed taking turns devising and mixing their own individual-sized smoothie. Works for Me!


Previously on WFMW:

100_1653 100_0730

Wednesday, February 28, 2007

WFMW: Musical Mornings

This past fall, I grew discouraged over the length of time it took my kids to get ready in the morning. When I came across a CD program online that set a morning routine to music, I thought "Great idea, but I'll do it myself!" The tasks featured in the program would not have been all that helpful to my family, but my husband James and I took the concept and created one of our own tailored to our family.

First I made a list of all the tasks that the kids needed to accomplish in the morning and listed a time frame that I thought would be appropriate for each. Next, I located short, upbeat classical pieces or kids' songs that would fit the time needed. James found a blank tape and recorded his voice cheerfully greeting the children and instructing them step-by-step through the morning chores with music following each instruction. (Since the kids hear my voice for the majority of the day, we decided to have James give the instructions.) Some of the chores differed with each child. For instance, James told my daughter to brush her hair while the boys cared for the guinea pig. Finally, I made a chore chart on the computer with each child's chores listed and a place to check them off when completed each day.

The original CD program recommended rewarding the children with a one-on-one date with a parent as a reward when a certain number of points were achieved. We used that reward once with each child, but then changed our minds. We told them that we didn't want them to feel like they had to earn time with their mom or dad. We wanted to just spend one-on-one time with them whenever we felt like it. I suggested that we change the reward to a book for each child which they thought was a good idea. Recently, after about a month of work, each kid earned a book.

As to the effectiveness of the tape, it works wonderfully! Though it took some time to set up, we are extremely pleased with the results.
The tape reminds the kids what needs to be done in an orderly fashion and they are motivated to get each chore done in the time frame to earn a point. There has been less "forgetting" and more timeliness without nagging. I've been able to take care of the baby without distraction, knowing that they are getting their jobs done!

We have used the morning routine tape in our family Monday through Saturday (later start on Saturday) since early October. My seven year old daughter says that she has the tape memorized and doesn't really need its prompting anymore. Maybe we ought to test that claim sometime! My nine year old son still likes the tape. Prior to the tape, he was the most likely to space his duties and dawdle. The tape has been a cheerful, upbeat way of keeping him on task. My ten year old son appreciates the tape, because it helps them to get going faster, which allows a timely start and finish to homeschooling each day. He says that he doesn't want to ever quit using the tape! Of course, they all enjoy the positive reinforcement of rewards.

Works for me! To read more helpful tips, visit Rocks in My Dryer.

Click on the pictures to see previous WFMW entries:

100_1653 100_0730

Wednesday, February 21, 2007

Works for Me Wednesday: Refrigerator Pictures

wfmwheaderThe following is a re-post in order to share this idea with WFMW participants:

The messy collage of pictures precariously held up by magnets all over my refrigerator has been getting on my nerves. This week I decided to try a new idea.

Sophie has a French memo board in her room where she puts pictures of her friends and cousins, as well as birthday cards, or presently, Valentine's cards. She did such a nice, neat job of arranging it, that I decided to figure out a way of attaching such a board to the fridge. I bought a board, found strips of magnets that I had saved, and with a glue-gun, attached a generous amount to the back of the board. Here is the result:


If you decide to try this idea and the magnets aren't strong enough, someone suggested in the comment section to try using adhesive velcro strips.

For more Works for Me Wednesday tips, visit Rocks in My Dryer

Wednesday, January 24, 2007

WFMW: Changing Station

When my oldest three children were babies, the house where we lived had a bathroom with a long counter next to the sink. I enjoyed having a diaper changing station on the counter by a water source, making clean-up a snap.

Seven years later finds us in a new house with a new baby, but no bathroom with a counter long enough for a changing station. After a week with my newborn, I came up with a new plan. Our new changing station is in our powder room/laundry room. The changing pad sits on top of our front-loader washing machine with room behind it for a basket containing cloth diapers and a small diaper pail. The sink is within arm's reach and the cloth wipes are located in a small basket on top of the toilet. We have a colorful mobile hanging by fishing line from a clothes pole above the washing machine to provide entertainment for baby during the changes.
100_0730
The benefits to having the changing station in the laundry room?
  • Access to a water source

  • Hard surfaces for easy clean-up when baby behaves like a human fountain (saves the carpet in the "nursery")

  • Mom can multi-task. While baby is still happy on the changing pad, a load of laundry can be thrown in the washer right below, or switched to the dryer. (If I had a top-loader, the changing pad would be on the dryer.)
Works for me! To see other Works for Me Wednesday ideas visit Shannon at Rocks in My Dryer.

Wednesday, January 10, 2007

Works for Me Wednesday: Healthy Recipes


(To my dad: Sorry, this is a recipe post. Come back later. )


This is my first post participating in the WFMW carnival hosted by Rocks in My Dryer. The theme for this WFMW is "healthy recipes", and while I personally think that diets and too many low-fat recipes usually lead to weight gain, I am into "healthy."

I've been contemplating sharing some recipes that I came across while browsing the Rachel Ray cooking site recently. I think that Mu Shu Chicken fits the healthy criteria and is even low-fat. I substituted ground turkey for the ground chicken, and my whole family declared the recipe a keeper.

Another Rachel Ray recipe that would fit the healthy bill, though probably not low-fat, is Chicken Tortilla Pie. I've made this twice in the past two weeks, again winning the approval of my family. The recipe calls for ground chicken again, but I just used chicken leftover from a roasted chicken. I also think that ground beef would work. The tang of the tomatillas in the casserole makes it stand out from other Mexican casserole recipes. (We had never had tomatillas before ~ yum!) Don't fall for the "30 Minute Recipe" label, though. I bet that only a chef with assistants could accomplish it in 30 minutes!

When we replaced our dinosaur of a computer with a laptop almost two years ago, I never imagined a computer would come in so handy in the kitchen. I often park it on a kitchen counter to refer to recipes that I've posted on my blog, or in Word files, or that I've found on allrecipes.com or other recipe sites. Of course, I have to be careful to keep it clean, but it stays open and propped up better than a cookbook and is easier to read than a recipe card!